
Turn Your 3-D Printer, Laser & CNC Into a Revenue Machine

Garage-Shop Gold Rush: Why the Fab Market Is Headed for $432 B by 2032—and How You Can Claim Your Slice
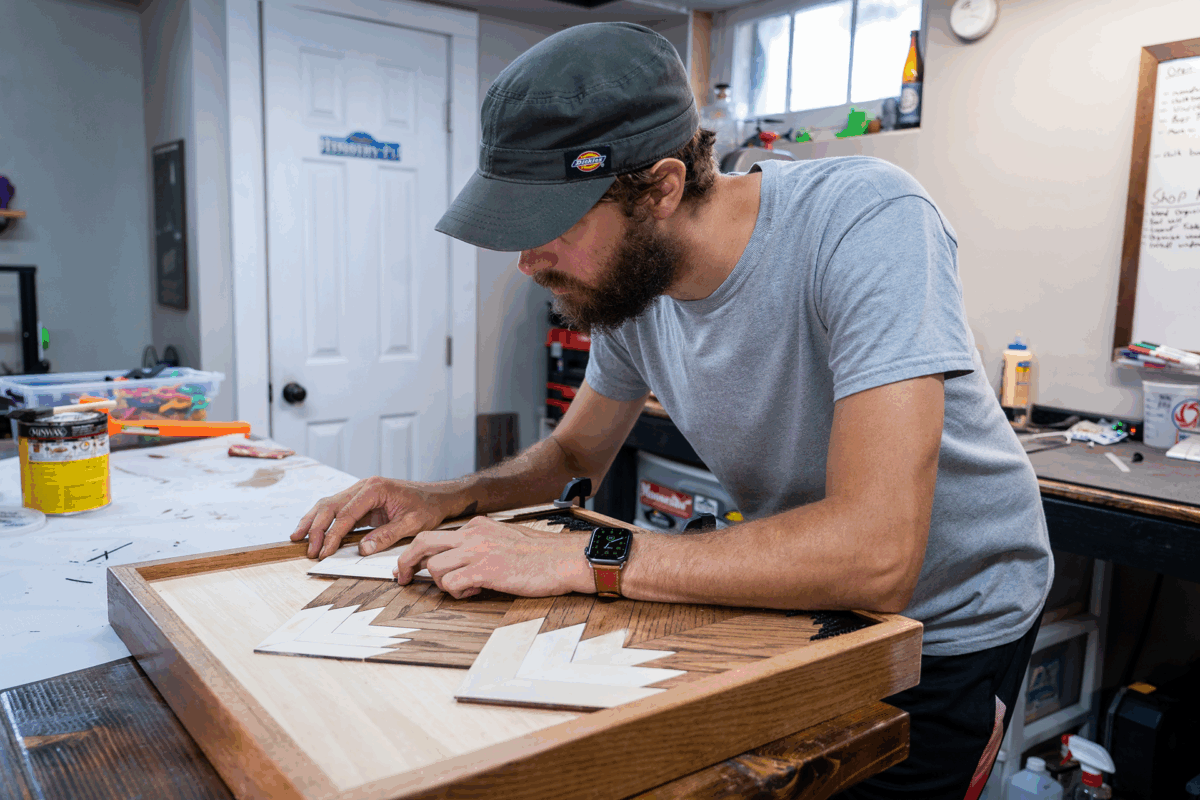
The weather finally broke after what felt like six months of rain, and I decided to try something different. Armed with the Einstar Vega portable 3D scanner, I set off on a hike through the woods—on a mission to scan a tree trunk in its natural environment and turn it into something useful back at the shop.
Spoiler: it worked better than I expected.
Hiking with a 3D Scanner
My goal was to find a tree with a dramatic, root-flared base—something with a lot of texture and personality. After scouting a few contenders, I found the one: plenty of bark detail, beautiful root flare, and perfect lighting thanks to an overcast sky.
I fired up the Vega in fast scan mode, which works well for larger objects. The tracking held surprisingly well, and the scan wrapped up with a clean, complete point cloud on the first pass. I did a couple more passes for good measure, then grabbed a few bonus scans of interesting branches along the way.
Cleaning the Scan in StarVision
Back in the shop, I brought the scan into StarVision and cleaned it up:
- Cropped off unnecessary parts of the trunk and ground
- Removed stray leaves and floating bits
- flattened the base for printing
- Filled the mesh to make it watertight
It only took a few minutes to get a clean, printable mesh that preserved the organic texture and shape of the tree.
Making a Pen Holder in Bambu Studio and Fusion 360
I brought the tree mesh into Bambu Studio first to quickly add a simple cylinder cutout for pens. It worked great, but I also wanted to demonstrate how to do it with more control in Fusion 360, so I created a second version with a customized recess.
Adding The Recess In Bambu Studio
For a quick and easy way to modify a mesh with simple geometric shapes, Bambu Studio is a great choice. Adding a cylindrical recess to the tree scan only took a few steps after importing the file.
Step 1: import your STL file
Step 2: Create a cylinder (Right click on your object, the select Modifier > Cylinder.)
Step 3: Scale and position your cylinder
Step 4: Subtract the cylinder from your object.

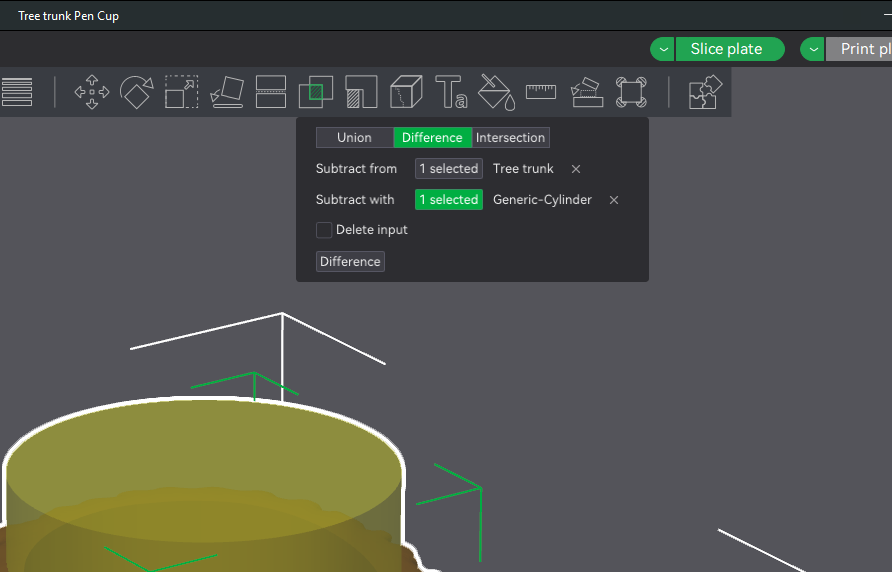
Both workflows get the job done—it just depends how precise you want to be.
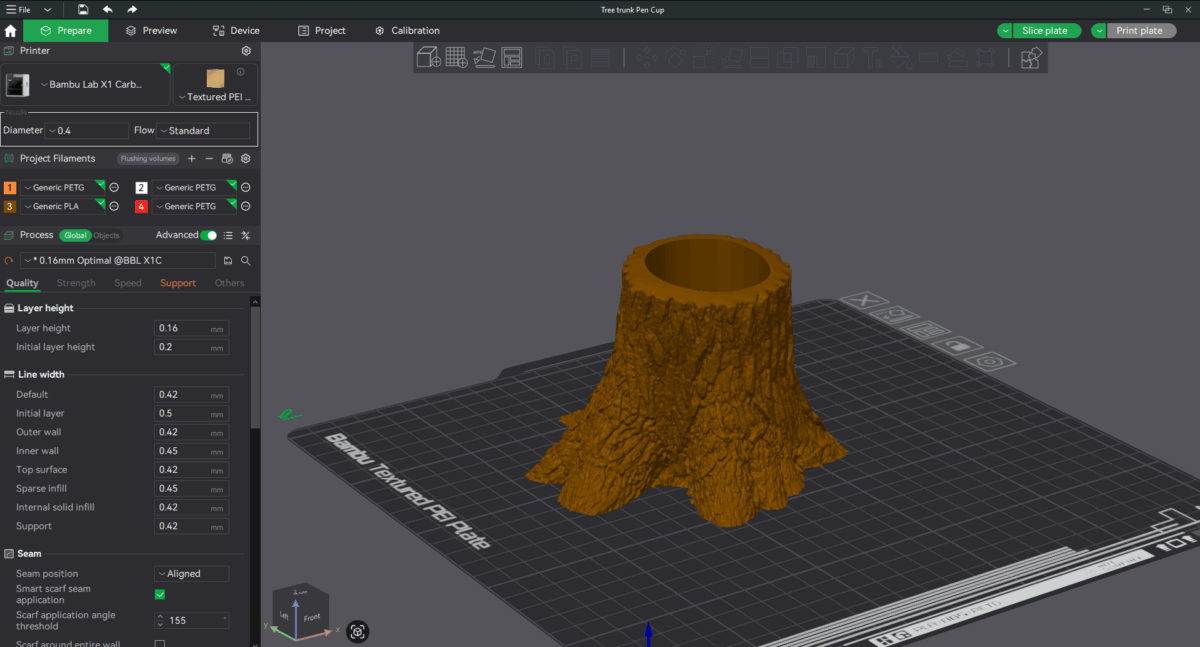
3D Printing the Tree
Once the model was ready, I scaled it down to about 75mm tall and printed it on my Bambu Lab printer. The result?
Way better than I expected!
The texture of the bark translated beautifully. The pen recess is clean. And the overall piece feels like a tiny sculpture pulled straight from the forest.
📦 Download the Files
✅ Free Tier – STL for 3D Printing:
Want to print the pen holder for yourself? You can download the STL file here:
👉 Download on Patreon – Free Tier
💎 Paid Tier – Full Project Files:
If you want to remix or modify this tree yourself, you can get the complete file pack:
- Original 3D scan mesh
- Cleaned and watertight mesh
- Fusion 360 file
- STEP file
👉 Access Full Files on Patreon – Paid Tier
🎥 Watch the Full Project on YouTube
If you haven’t seen the video yet, you can watch the full hike-to-print journey on my YouTube channel. It’s a fun mix of scanning tips, nature therapy, and digital fabrication.
🌟 Final Thoughts
This was a super satisfying project—from the hike, to the scan, to holding the finished print in my hand the next morning. I’ve done a lot of 3D scanning in the shop, but bringing that process outdoors opens up a whole new world of creative possibilities.
If you end up using the files—especially the full scan—I’d love to see what you make. Drop a comment on the video or shoot me a DM on Instagram.
Happy making!